Friday, September 24, 2010

TUTU Give Away


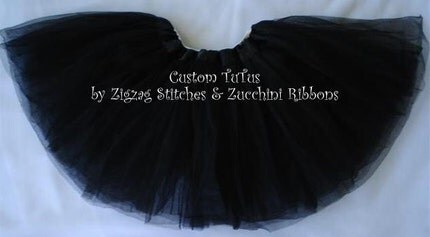
Time for a TUTU GIVE AWAY!!!


 I'm giving away a tutu (up to $30 value) to 2 lucky readers.

Here's how to enter to win:
  • Visit my etsy shop here, check out my shop and browse around for a bit, and then choose your very favorite tutu(s) over on the site.  Then come back and let me know what you like, in one comment.     
  •  Be sure to leave your email address so that I can contact you if you've won.
  • Gain an extra entry by suggesting my facebook page to your friends.  Visit my Zigzag Zucchini Facebook page here. In the left column, click on "Suggest to friends" and recommend to your friends. Then come back, and leave an additional comment that you shared..  

 This giveaway ends Saturday, October 2nd at midnight.


new graphics from Midnight Design Studio

I just got all new fancy graphics & I'm uber excited.


Fancy, I know! 
I got everything in a package (& at a great deal!) So, I now have matching blog & Etsy banners, avatars, and Mini Cards, which I plan to use as clothing tags. I just the way they turned out. 

I got these dapper designs from Kimberly  at Midnight Design Studio.  Kimberly was great, very helpful (she answered all 1001 and one of my questions, and was so patient with me thru my ADD distracting side turns! ha!) All in all, I loved the way they turned out and opportunity to make a new friend.


Blog : midnightdesignstudio.typepad.com/
Website(look here for awesome artwork): gluepaperscissors.net
Etsy Shop: midnightdesignstudio.etsy.com

Head over to her website. This girl has it going. Not only is she great at graphic design, but she's also a amazingly talented mixed media artist, and sister sewer(yay!)   

So, leave me a comment and let me know what you think!

Local Hauntings-


Thursday, September 23, 2010

Zucchini Ribbons


3 small zucchini (about 1 lb.)
3 small yellow summer squash (about 1 lb.)
1 large daikon radish (about 1/2 lb.)
20 medium basil leaves, very thinly sliced
2 tsp. chopped fresh oregano
6 Tbs. extra-virgin olive oil
2 Tbs. fresh lemon juice
1 tsp. finely grated lemon zest
Kosher salt and freshly ground black pepper
Small basil leaves for garnish (optional)


How to:
Trim the ends of the zucchini and yellow summer squash. With a vegetable peeler, shave the zucchini lengthwise into long, wide strips about 1/16 inch thick. When you get to the center of the zucchini, where the seeds are, turn it over and slice from the other side until you get to the center again. Discard the center. Put the zucchini ribbons in a large bowl. Slice the yellow squash using the same technique and add them to the zucchini. Peel off and discard the rough exterior peel of the daikon and then shave the daikon as you did the squash. Add the strips to the bowl with the squash, along with the basil and oregano.
In a small bowl, whisk the olive oil, lemon juice, and lemon zest. Season to taste with salt and pepper. Toss the vegetables with enough of the vinaigrette to lightly coat them (you may not need all of the vinaigrette) and season to taste with salt and pepper. Serve immediately, garnished with the small basil leaves (if using).

Great on a hot summer day alone or atop a bed of lettuce.
Try with chuncks of mozarella cheese & grape tomatoes .

Wednesday, September 15, 2010

custom and crafty in the kitchen (w/ chef hat how-to)

What a fun week!
 I had the opportunity to make some "Sweet" kitchen gear, for an individual who is surprising her granddaughter for her birthday. Her granddaughter, is turning 15, and aspires to own her bakery one day.

It was a lot of fun putting together. 
I love the dessert print with the white on pink polka dots. so so so cute.
I'm also quite partial to the ruffles on the apron.
But what was most fun and surprising easy to make was the chef hat.
Pics & details below. Enjoy!


Custom Apron with coordinating fabric ties & pockets


Apron embroidery


matching kitchen towel & pot holder

Custom chef hat - special thanks to Nana for modeling. hehe

Chef Hat How- to:
  1. Cut a 24" circle, and 5 x 24" strip for the band.
  2. Use interfacing and press halves together of band. Make a 1/2" seam, to make a circle, this is your "back" mark.
  3. Mark band and circle for "front", "sides", and "back", and pin together.
  4. Pin together band and circle creating ruffles/pleats and sew together creating a 1/2" facing.
  5. Sew in 4" long piece of 1" elastic, centered and pulled at "back" mark.
  6. Make your Nana model the hat for you & then laugh hysterically.

Monday, September 13, 2010

custom silverware case

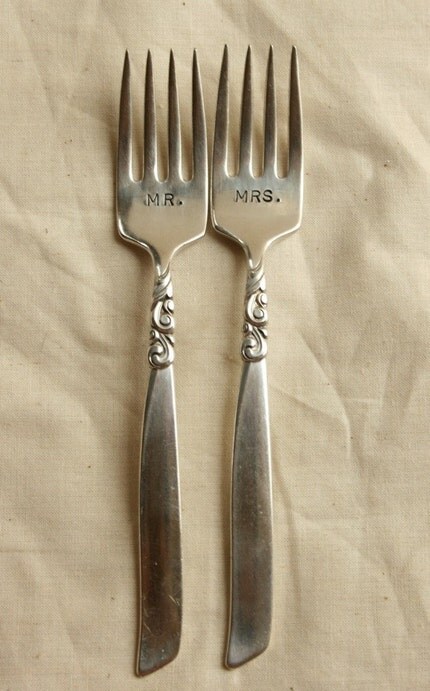
I had the opportunity to make a custom case for a gal who had custom forks hand stamped
for her friends who are getting married next week...

The forks were hand stamped by Beach House Living. Check out their etsy shop
(they have lots of beautiful hand-stamped & handcrafted things.)

Hand stamped wedding cake forks, by Beach House Living
 When initially discussing ideas for a case, we considered a fabric envelope, or an artist brush/ knitting needles utility style roll-up with pockets. But when I saw the gorgeous forks,
I was inspired to recreate the jewelry case for my pearls. 

Each fork measures 6 3/4" tall, so I constructed the case to be approximately 8" tall and 6" wide.
I used thick card stock for the construction, and lined the embroidered black polyester blend
with quilting batting to give it a softer look.


The embroidery is a traditional wedding monogram (groom first initial - last name initial - bride's first initial) stitched with Gutterman silk thread in a beautiful Script font. 


For the lining of the case I used a beautiful black on white damask print fabric,
and included thin magnets under the fabric for closures.


To protect & display the silverware I included batting in the middle section too.
I sewed in grosgrain ribbon and added flaps to hold forks in place.


Congratulations to soon-to-be Mr. & Mrs. C.!

Saturday, September 4, 2010

sweet fabric


been on a hunt for fabric for a custom order apron/chef hat that I'm doing.
Here are some sweet finds...


Let's bake
Cupcakes Tossed
Michael Miller's Just Cakes
Just desserts
Chef words
Chef Blocks

Anniversary skulls

I haven't been to productive in the last few days, in that I've been under (way under) the weather. I'm hopeful for tomorrow, that I'll start feeling like myself again, I've been fighting this funk for nearly 2 weeks now.

Today is Dust's & my 1st wedding anniversary (awww & stuff, right?)
skeleton wedding- Our 1st Anniversary
 In leui of making a card, I embroidered a hankie. Not sure what ever happens to the cards I buy, but hankies cost the same thing & are arguably more practical.
skeleton wedding closeup


And something else exciting today......
  one of my other skull handkerchiefs is featured on an Etsy Treasury
curated by the ThePrairieRose.

And while we on skully note, check out this fabric I found.
JoAnn's Novelty Cotton Fabric- Flower Skulls

JoAnn's Novelty Cotton Fabric - Los Novios

Wednesday, September 1, 2010

bib for baby...what a hoot!!

Yesterday was a busy day with monogram orders, so when I got to switch up to this special order owl applique bib, I was especially excited. This button-eyed owl is too much of a "hoot" not to share!...


This process of making bib for baby is quite easy. First machine applique or embroider your design.
This adorable owl is machine appliqued with these two fabrics

After machine appliqueing the owl design, I cut out two identical "bib-shapes." Be creative and make one up or use a bib that you have as a pattern.I used the same polka-dot vintage fabric that I appliqued in the owl. Or you could you terry cloth, for easy cleaning up of baby after feeding. (On a side note you could also add something to the back...a design, name, or pocket, since bib could be reversible.)


Then sew right sides together, leaving an opening. Cut your corners, then turn rights sides out. Press bib down and slip stitch opening closed.


Finally, stitch on Velcro closures & Viola!
 Button-eyed owl bib for baby!